Publishing a Package
In the previous sections, we dove into the details of how our MapToSurface package is set up with custom nodes and example files. But how do we publish a package that has been developed locally? This case study demonstrates how to publish a package from a set of files in a local folder.
 There are many ways to publish a package. Below is the process that we advise: publish locally, develop locally, and then publish online. We'll start with a folder containing all of the files in the package.
Uninstalling a Package
Before we jump into publishing the MapToSurface package, if you installed the package from the previous lesson, uninstall it so that you're not working with identical packages.
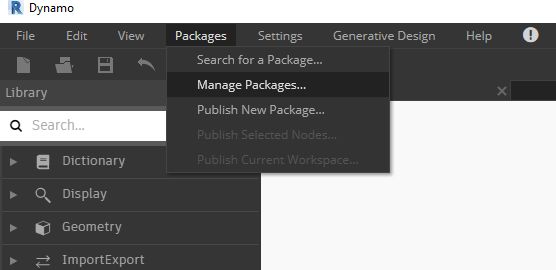
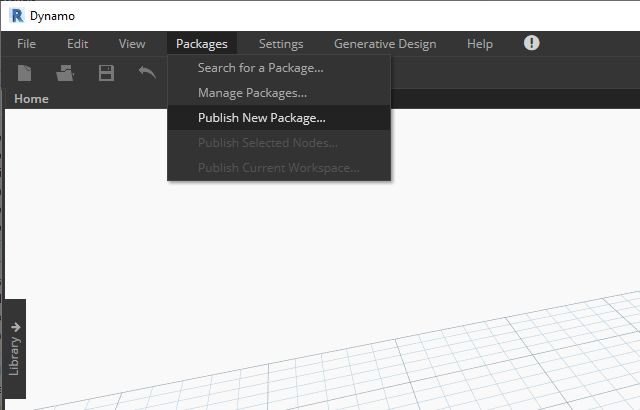
Begin by going to Packages>Manage Packages...
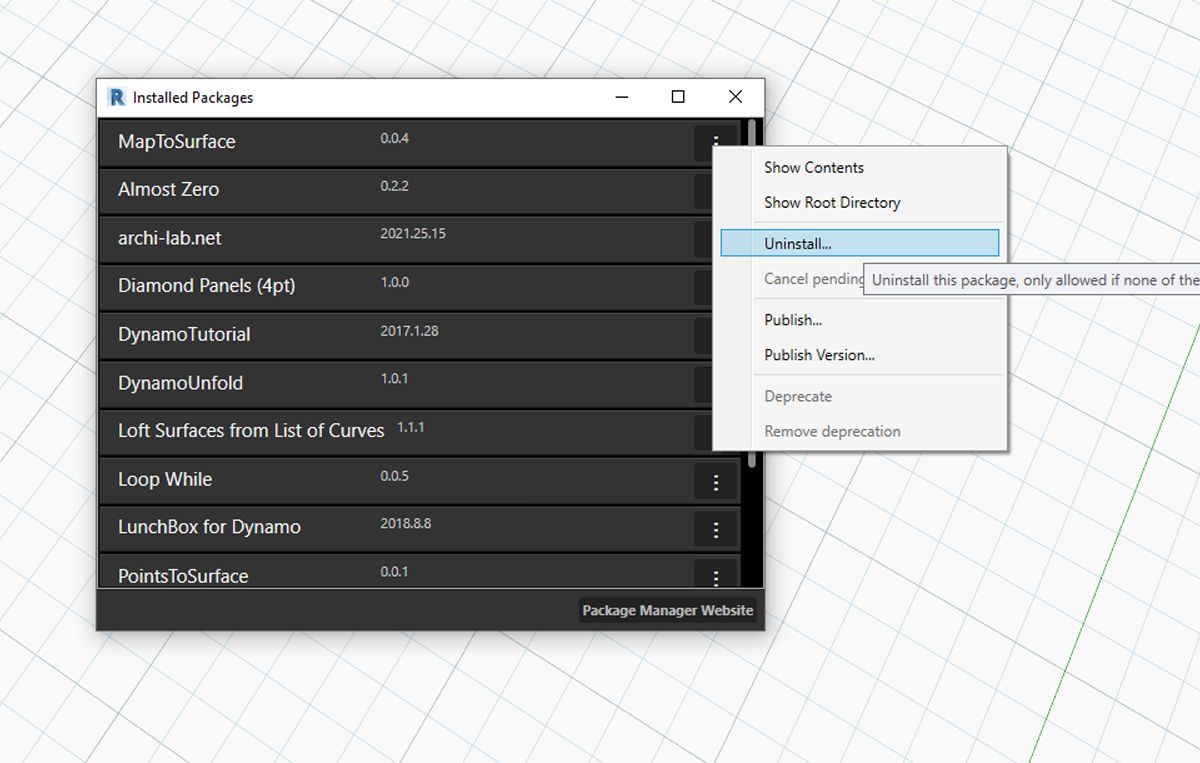
Select the button corresponding to "MapToSurface" and select "Uninstall...". Then restart Dynamo. When reopening, when you check the "Manage Packages" window, the MapToSurface should no longer be there. Now we're ready to start from the beginning!
Publishing a Package Locally
Note: As of writing this, Dynamo package publication is only enabled in Dynamo for Revit and Dynamo for Civil 3d. Dynamo Sandbox does not have publishing functionality.
Download and unzip the example files that accompany this package case study (Right click and "Save Link As..."). A full list of example files can be found in the Appendix. MapToSurface.zip
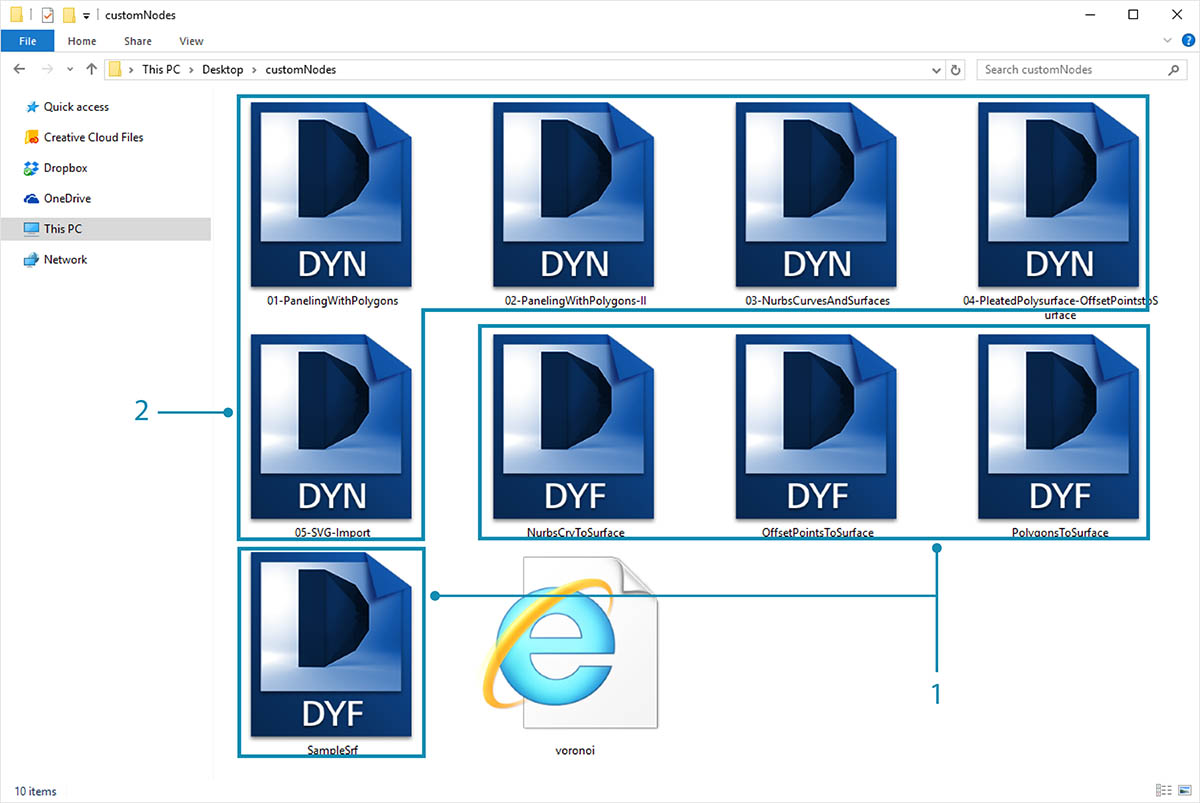
This is the first submission for our package, and we've placed all of the example files and custom nodes into one folder. With this folder prepared, we're ready to upload to the Dynamo Package Manager.
- This folder contains five custom nodes (.dyf).
- This folder also contains five example files (.dyn) and one imported vector file (.svg). These files will serve as introductory exercises to show the user how to work with the custom nodes.
In Dynamo, begin by clicking Packages>Publish New Package...
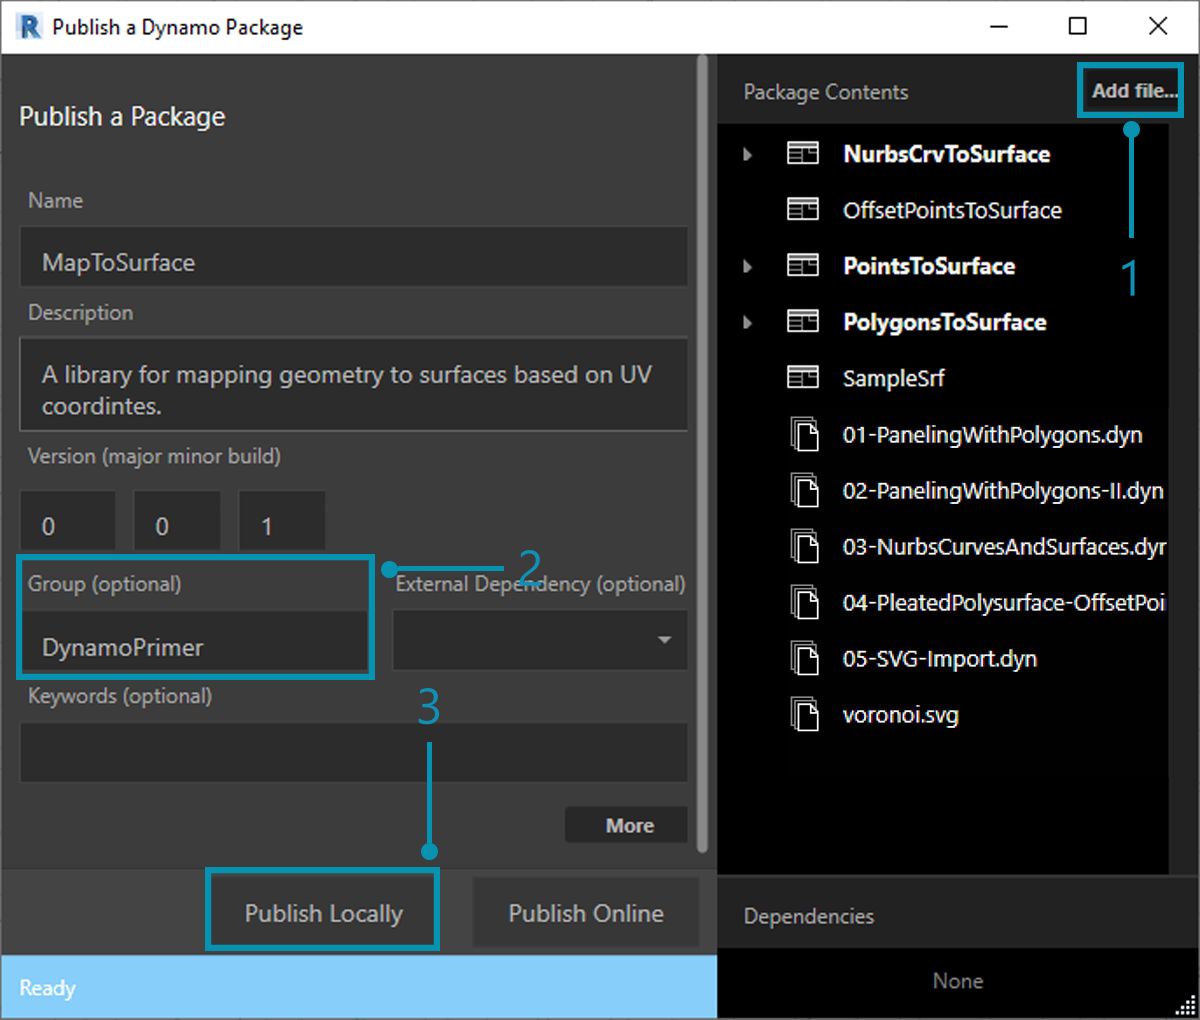
In the "Publish a Dynamo Package" window, we've filled out the relevant forms on the left of the window.
- By clicking "Add File", we've also added the files from the folder structure on the right side of the screen (to add files which are not .dyf files, be sure to change your file type in the browser window to "All Files(.)". Notice that we've added every file, custom node (.dyf) or example file (.dyn), indiscriminately. Dynamo will categories these items when we publish the package.
- The "Group" field defines which group to find the custom nodes in the Dynamo UI.
- Publish by clicking "Publish Locally". If you're following along, be certain to click "Publish Locally" and not "Publish Online"; we don't want a bunch of duplicate packages on the Package Manager.
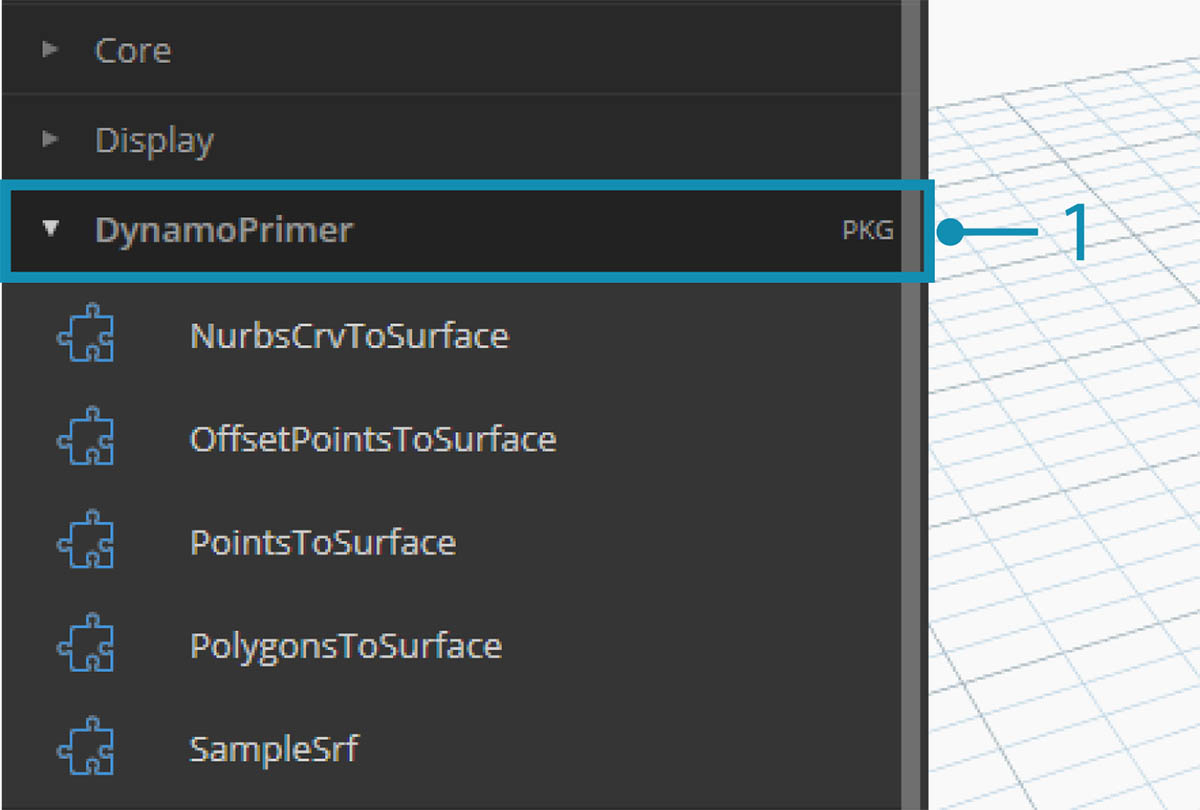
- After publishing, the custom nodes should be available under the "DynamoPrimer" group or your Dynamo Library.
Now let's look at the root directory to see how Dynamo has formatted the package we just created. Do this by clicking Packages>Manage Packages...
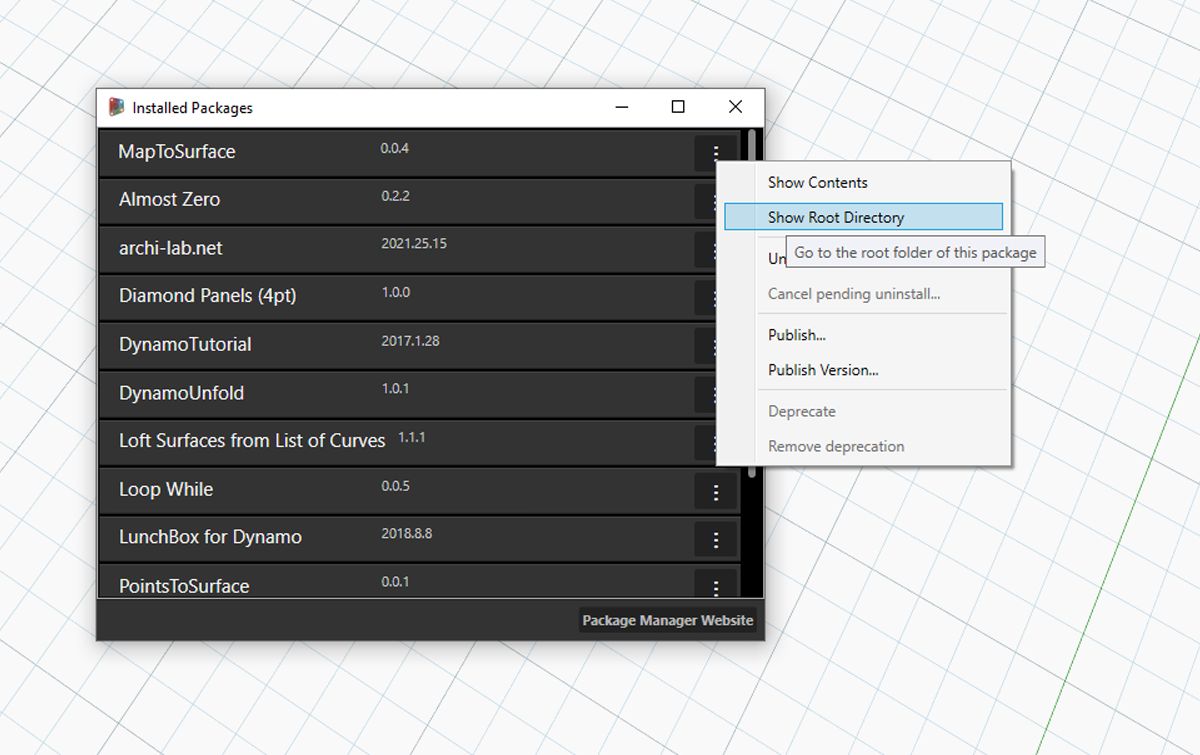
In the manage packages window, click on the three vertical dots to the right of "MapToSurface" and choose "Show Root Directory".

Notice that the root directory is in the local location of your package (remember, we published the package "locally"). Dynamo is currently referencing this folder to read custom nodes. It's therefore important to locally publish the directory to a permanent folder location (ie: not your desktop). Here is the Dynamo package folder breakdown:
- The bin folder houses .dll files created with C# or Zero-Touch libraries. We don't have any for this package so this folder is blank for this example.
- The dyf folder houses the custom nodes. Opening this will reveal all of the custom nodes (.dyf files) for this package.
- The extra folder houses all additional files. These files are likely to be Dynamo Files (.dyn) or any additional files required (.svg, .xls, .jpeg, .sat, etc.).
- The pkg file is a basic text file defining the package settings. This is automated in Dynamo, but can be edited if you want to get into the details.
Publishing a Package Online
Note: please do not follow along with this step unless you are actually publishing a package of your own!
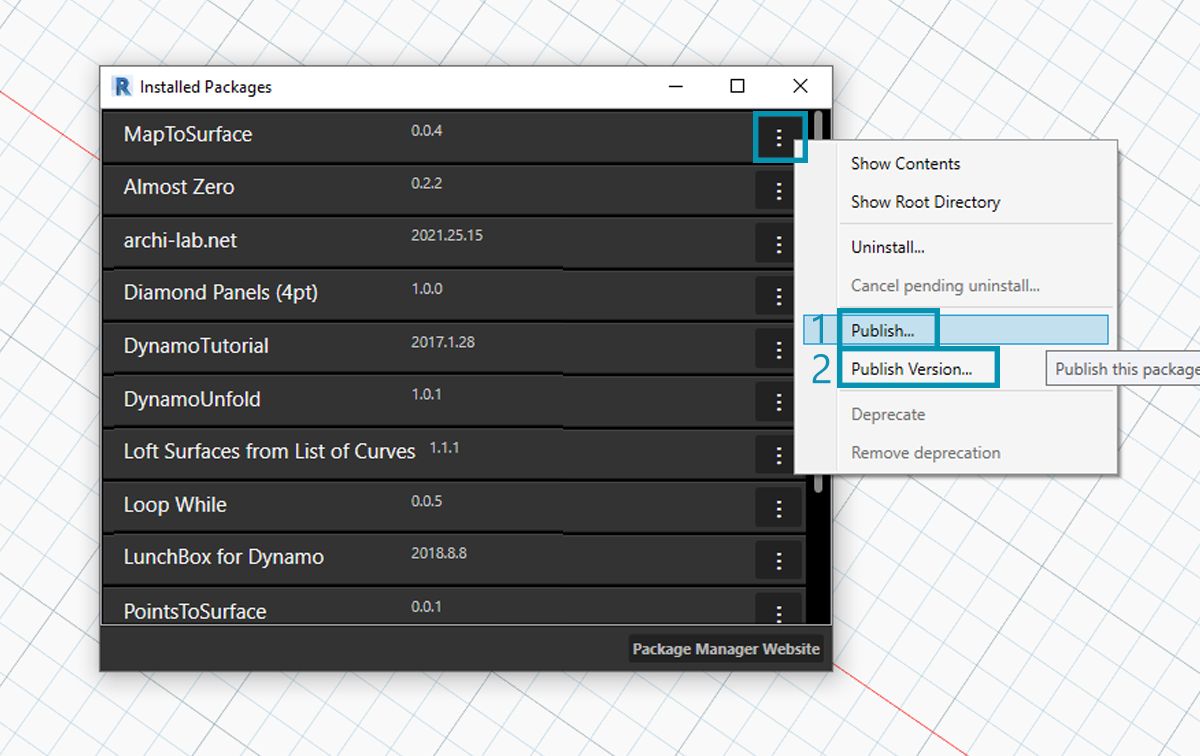
- When you're ready to publish, in the "Manage Packages" window, select the button the right of MapToSurface and choose Publish...
- If you're updating a package that has already been published, choose "Publish Version" and Dynamo will update your package online based on the new files in that package's root directory. Simple as that!
Publish Version...
When you update the files in your published package's root folder, you can publish a new version of the package by selecting "Publish Version..." in the Manage Packages window. This is a seamless way to make necessary updates to your content and share with the community. Publish Version will only work if you're the maintainer of the package.